Tuesday, January 31, 2012

Weekend Projects

This past weekend I went to a wonderful cabin in Danburry Wi, with a bunch of fun girls from work! I spent most of my time sewing! Here are some of the things I was able to get done! 

1. New ruffle tote. I created this pattern while I was there. Fun ruffles on the outside and lots of pockets on the inside! I was inspired by pinterest on the ruffles, but I did completely design this one! 
2. I made another Mail Sack and a matching clutch. The clutch pattern is from Keyka Lou. I found it on pinterest of course! It was easy to follow and she has so many to choose from!!! Check her out! 


3. Then I made this button bracelet. Another idea from pinterest! I am sensing a theme here! 

The tutorial can be found at hope studios, and the buttons were bought from Michales, part of Tim Holtz design collection! I love his stuff!! 


It was a fun and productive weekend! 
Have you been pinspired lately? 


Thursday, January 26, 2012

Mail Sack

I bought a great new pattern called the Mail Sack by Pink Chalk Studio.
I finally found something I wanted to make with my cosmo cricket fabric! I made the smaller bag, the pattern comes with 2 sizes, 12 x12 and 16 x16. It was very easy to make, the pattern is well written and very easy to follow! 

Since this is the 12 x 12 bag, I did have to adjust the strap length to make it long enough for me. 


This is the perfect size purse, this weekend I will be making the larger one to take on our vacation. I will share when it's done! I bought some fun bright fabric for that one! 
Here is the link to their website:
So many fun things!!! 


Tuesday, January 24, 2012

DIY Wall Art

When I painted my bar area, I also decided that I needed some new decor. I did not want to spend any money so I only used stuff I had on hand. Once I decided to hang the ladder on the wall, I thought I would make some fun art to place on it. I started by using some wood that I had already painted and glazed. Next I selected the pictures that I wanted to use, re-sized them in photo shop to fit by boards and print onto regular copy paper. 
 Decide where they will be placed on the boards. Remove the pictures and cover the board with a coat of mod podge.

 Place the picture back on the board and add another coat of mod-podge over the picture to seal it. I used a brayer to help push out any air bubbles and to keep it smooth. Let dry.

 Next I grabbed a bunch of fun embellishments and played around until I knew what I wanted. I used hot glue to attach everything, and that's it. They took maybe 30 minutes to make, and cost $0.
 Here they are, all done! My bar area is coffee themed, so the photos I found-all on pinterest, were just perfect!


Sunday, January 22, 2012

Color Change

The plan was to repaint a small area in my kitchen. I wasn't really happy with the shade of brown and was in love with grey lately. So I bought a gallon of grey paint for an area that took maybe 1/4 of a quart! So I had all this paint left over. 
Downstairs I had 2 walls that had been a golden yellow color, which I always liked until recently I made a wreath and hung it up and decided that I no longer liked the golden yellow. My hubby loves it when I do this! 
Here it is. 
Blech! So since I had all the grey left I decided to make a change! 
I paint both walls grey, and once I started I could not paint fast enough. I was loving the grey!! 

 I had Mike hang a ladder on the wall to use as my new shelf.
 I made the 3 wood signs on the ladder, a tutorial will be coming soon!!

 Here is the same door shelf with my new wreath, it looks so much better I think!


 I made a new curtain, it is made from the same fabric as the wreath. I just love it!!!


Now I better get back to the kitchen, that I have since painted back to brown, just darker than what was there before. I will post more later!! Have a great Sunday! 

Sunday, January 15, 2012

Put a bird on it

So the other day a co-worker showed me this clip from a new TV show called Portlandia, if you craft, blog, pin, DIY, etc, I think you will find it funny. Put a bird on it!


I laugh every time I watch it, and the truth is, many things really are cutter if you put a bird on it! 

I now have a pinterest board dedicated to just that, you can see it HERE
Have fun, and if it looks too plain remember, you can always
PUT A BIRD ON IT! 

Wednesday, January 11, 2012

Healthy Chai Tea Latte

Every night I tend to crave a hot creamy mocha. 
However I do not need the extra calories and sugar, especially before bed.
So I have created a great drink that does the trick and is just 45 calories and full of flavor! 
Chai Tea latte

You will need:
1 Chai tea bag ( I use decaf at night)
3/4 c boiling water
3/4 c hot almond milk
1/4 t almond extract
1/2 t cinnamon
1/4 t cloves
1/4 t nutmeg
1-2 Packets of splenda

Steep the tea bag in the boiling water for about 5 min.
Mix spices and splenda and add to the tea.
Add the almond extract & hot milk.
Sprinkle with cinnamon.

Sure beats the ones at Starbucks that are 230 calories w 42 grams of sugar! 

Enjoy!!

Monday, January 9, 2012

Fabric flower wreath tutorial

Over the weekend I made a wreath that I can leave out all year round. You will need:
1 18" wreath frame
4 felt squares, or any fabric scraps to wrap around it
Several 1 1/4 " strips of fabric more or less depending on how full you want the wreath to be. Mine were 16-24 inches long, the longer the fabric strip the fuller the flower. 
Hot glue gun and lots of glue sticks
ruffler foot
Lets start!! 
 Cut your felt into 2 inch srips. Hot glue the edge of the felt to the inside of the wreath frame. Wrap felt around the frame and glue the loose end to the back. Continue to do this with the felt until the entire wreath frame is covered.
This is what it will look like when you are done. 

 Now it is time to ruffle (or gather if you don't have a ruffler foot) I ruffled all of my fabric strips at 3.5 stitch width, and on a 6. I did ruffle some of them at 1 which made for a really full flower, I liked having them a little different! I would guess that I had about 50 strips of fabric when I was all done.
 Coil up the fabric into a loose circle. I would sometimes hold it tight at the bottom and let the top be a little looser, it all depends on how you like your flowers.
 Spread some hot glue on the felt, make a round glue puddle and press the bottom of your flower into your glue puddle.
  Press it down until it looks the way you want, flatten it out a bit, don't let the flower stand straight up and down.
 Continue to this until your wreath is covered with flowers. Once I thought I was done I made some smaller flowers and added them in to any spot that looked like it was a little bare. Add a ribbon to the top for a loop to hang it from and you are done!


 Here is it all finished!


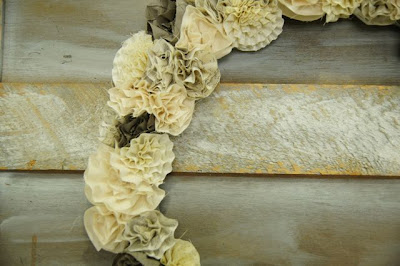
 You can see the large and small flowers and different colors & patterns all over. This can finally stay up all year and I can change my decor around it to work with the seasons!