Tuesday, January 27, 2015

Closet turned office

January has been the month of purging for me! I have cleaned out so many spaces in my home and gotten rid of a ton of stuff! It feels great and should have been done years ago!! This weekend the kids and I tackled a closet. This area used to be an entry way to the home. Once we added on, the closet became a catch all. 
So we emptied it out and I made an office for my hubby!! 
The kids helped remove old wall paper. And we peeped the walls for paint!
Removing the wall paper made me so glad we hung it properly! It was so easy! 
The space is quite small so I wanted to keep it neutral and functional!
This mirror was glued to the wall and I didn't even want to attempt removing it for fear of a giant hole in the wall. I painted it with chalkboard paint and trimmed it out with vintage rulers! Perfect for the construction office! 
Here's how it came together:
We built the desk from plywood! It will be perfect for the computer and doing paperwork. 

We made this bench form an old door. Perfect below the window for reading! 
I love the space! It adds so much to this part of our home!! 
I hope this leaves you feeling inspired! You don't need a ton of space to create a perfect little office!!

Missy
The little green bean

Ps! I almost forgot! I am part of a fun giveaway on Instagram today! Be sure to check it out! There are some fun Valentine's Day prizes from several businesses! 

Monday, January 19, 2015

Transformation Tuesday-My workspace

I have posted about my craft room several times over the years. What can I say, I love my space! I also love to share and hope that it inspires even 1 person! I have an amazing room thanks to my hubby, he owns his own construction company and he really can build anything! So 1 1/2 yrs ago when I decided I needed him to remove a wall to join 2 rooms and make my room bigger, he didn't even argue! (yes he is a saint!) When we did that re model the room was primarily gray, and while I love neutral, after some time it was just OK.
Something else I realized was it just wasn't as efficient as it could be. I had items out all the time that I rarely used and things shoved n drawers and cabinets that I forgot I had and bought more of! 
It was time for a change! I was going to add some color, clean, purge & re-organize! And then I did just that! 
Here is what I new for sure; 
I wanted red and aqua accents. 
I wanted clear containers
I wanted more shelves for the walls to hold the clear containers
I needed more fabric storage (a lot was in a cubby)
I wanted more of what I love in this room

So I spent one Saturday afternoon shopping like it was my job. 
Target, Hobby Lobby & TjMAXX received a lot of my money that day! 

After cleaning, painting and a lot of re thinking my placement here is where I landed:

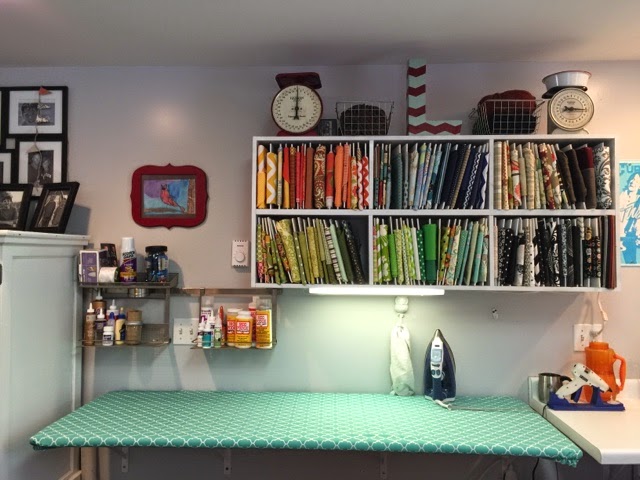
The walls are all the same gray color, but I used a wall stencil & some aqua paint to add the design! 

I am in this room, well a LOT. So I needed it to be functional but pretty & uplifting! 

As you can see, I have a lot of fabric. Now all of it is out right where I can see it. 
Later this week I will post a how to on the mini foam core bolts I made. 

Loving the 6ft long Ironing board!!! 


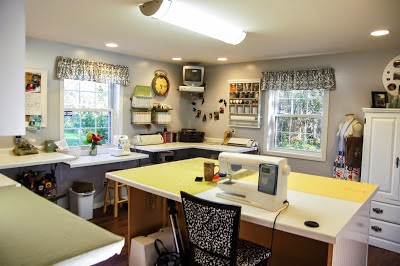
This room is really 2 room turned into one. The other half is more for paper crafting and has another great work counter that my kids love to use!


Everything now has a place and it works the way I need it to! 


If you have any questions on what I did, where I got specific items or organization in general, post them in the comments. I would be happy to help you out! 
Thanks for looking!

Sunday, January 18, 2015

Faux metal letters


I found these amazing letters on clearance for $4 each. Originally $35! 
There was just one problem, I couldn't find and E. Could be why they were on clearance! Ha! I figured I could find one online somewhere, so I bought my L,O,V letters. Well I found several "E" letters online. Even the one that matched this set. It was $40. After getting the other 3 so cheap I didn't want to spend that much on one. I decided to try and make one!
I used a priority mail box, a ruler, xacto knife and a marker.
I used the L as my template. 
Pretty so I had an E! I wanted the metal underneath so I could distress it like the metal letters. 
I started with my rustoleum metallic silver paint. 2 coats because I was painting on cardboard and I wanted to distress without showing cardboard. 
Next I sprayed on 2 coats of red. I waited very impatient as they dried. 
I did add a coat of the red to the front of the metal letters. The color was close but not quite the same. 
Once the letter was try I lightly sanded the edges and then added some clear coat. 

The sanding worked! It totally looks like metal!! 
I am so excited about my letters! 
I wasn't sure if it would work, but looking at them all together you really can not see a difference! Good enough for me! 

Saturday, January 17, 2015

DIY oversized ironing board

I don't know about you but craft projects and a standard size ironing board don't work too well! There is never enough room! So I made one and I'm going to show you how! It's very easy! 
Here is the shopping list: 
3/4" plywood cut to size
Metal wall anchors 
Heavy duty shelf brackets 
Batting 
Old sheet or plain fabric 
Fabric for cover
Elastic

The great news is you really only need a stapler and screw gun to do this! 
Home Depot sells many sizes of plywood pre cut and if they don't have what you need they will cut it for you! I would use at least 3/4" thick wood. 
You will also need heavy duty shelf brackets and metal screw anchors if you're not going into wall studs. Don't bother with the plastic ones! 
Measure and attach your brackets to the wall. We made sure to go right into studs! 
My board is 6 ft long so we used 4 shelf brackets. 
Next add the batting ( I used 2 layers) to the top & sides of the board. Simply lay it on top and fold over the sides. Secure it to the under side using a stapler. 
Next I add a fabric layer. I used an old sheet. I also cut so it will cover the top and wrap around the edges. 
Pull this layer nice and tight as you staple. Place the board on the brackets and screw in place from the underside. Now it's time to make the cover!
 
Pick a fabric that you love but know, it will get dirty and eventually if it's like mine, ruined from glues and adhesives! 
I cut mine approx 4" long and wider than the board. 
I marked the corned with a fabric pen to use as a guide to see the elastic in place. 
Use scissors to round the corner before you see the elastic in place. 
See elastic into all 4 corners and it's done!! 

Now it's time to go to Amazon and get a Teflon ironing May to use when I'm working with heat n bond! 😉
Iblove having this Ironing board it's crazy for all my projects and even better for long items like table cloths and curtains! 
Happy sewing! 

Thursday, January 15, 2015

Get organized for 2015!

There is something to the new year and an overwhelming feeling to clean, purge and re-organize! This year has been no exception for me! After the holidays, my craft room needs a serious deep cleaning! I try to stay organized as I go, but when things get crazy, that is the first thing to go for me!
I love my craft room, it is my happy place. When I walk in usually I feel inspired! I don't know if this year was different because I had been there so much or if my neutral room was just too neutral.
I have an amazing space but It was lacking some color! 
I had been thinking about new curtains, and then last week I found this:

Have you picked up this amazing new magazine yet? After I read it cover to cover I was so inspired! So first I cleaned and organized a ton!
And then I shopped like it was my job!!
I found the most amazing pieces!
Target dollar spot, amazing finds!

Just a smudge of what I found at Hobby Lobby, now that store is dangerous!


And a sneak peak as to where I am going! I can tell you now that I walk into this room and immediately feel inspired and happy! Color adds so much to a space. More to come this week, just a few final touches left and I can do a complete room reveal!