Showing posts with label Home Depot. Show all posts

Saturday, January 17, 2015

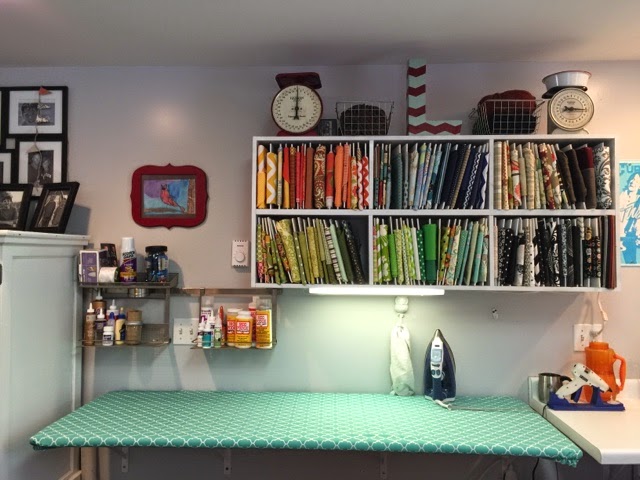
DIY oversized ironing board

I don't know about you but craft projects and a standard size ironing board don't work too well! There is never enough room! So I made one and I'm going to show you how! It's very easy! 
Here is the shopping list: 
3/4" plywood cut to size
Metal wall anchors 
Heavy duty shelf brackets 
Batting 
Old sheet or plain fabric 
Fabric for cover
Elastic

The great news is you really only need a stapler and screw gun to do this! 
Home Depot sells many sizes of plywood pre cut and if they don't have what you need they will cut it for you! I would use at least 3/4" thick wood. 
You will also need heavy duty shelf brackets and metal screw anchors if you're not going into wall studs. Don't bother with the plastic ones! 
Measure and attach your brackets to the wall. We made sure to go right into studs! 
My board is 6 ft long so we used 4 shelf brackets. 
Next add the batting ( I used 2 layers) to the top & sides of the board. Simply lay it on top and fold over the sides. Secure it to the under side using a stapler. 
Next I add a fabric layer. I used an old sheet. I also cut so it will cover the top and wrap around the edges. 
Pull this layer nice and tight as you staple. Place the board on the brackets and screw in place from the underside. Now it's time to make the cover!
 
Pick a fabric that you love but know, it will get dirty and eventually if it's like mine, ruined from glues and adhesives! 
I cut mine approx 4" long and wider than the board. 
I marked the corned with a fabric pen to use as a guide to see the elastic in place. 
Use scissors to round the corner before you see the elastic in place. 
See elastic into all 4 corners and it's done!! 

Now it's time to go to Amazon and get a Teflon ironing May to use when I'm working with heat n bond! 😉
Iblove having this Ironing board it's crazy for all my projects and even better for long items like table cloths and curtains! 
Happy sewing! 

Tuesday, January 6, 2015

Industrial boys bedroom

Nicholas room was in a need of a redo pretty badly in my option. He didn't seem to care! That's an 11 yr old boy for ya! He's not into sports or any characters so I found some things we boy liked on Pinterest and went from there. My only requirement was the brick wall my husband and I hand painted years ago had to stay! 
We picked out paint, bedding and lots of great room decor from Hobby Lobby! They really have some amazing pieces! 
He wanted blue and gray on the other walls. His bedding is from Target. He liked the blue and red and I was able to use the extra pieces to make some pillows and a cushion. 
Next was the industrial shelving! We saw some great examples on Pinterest, so my hubby designed this set. We went to Home Depot and bought all the pipe! 
I love how it turned out. I stained all the wood while hubby put the shelving together. I used Minwax gel stain in hickory. I also sanded down his bed and dresser and re finished them so all the wood matches. 
My little helper was hard at work with the palm sander! 
Here's the room all together!! It was so fun to do and now that's it's done, Nicholas loves it! 

I wonder how long he'll keep it clean!