Showing posts with label etsy. Show all posts

Friday, January 8, 2016

Instagram... it's where I have been

Wow! Its really 2016 and I have not blogged in months! I know I keep saying I will get better, and then life gets crazy and my poor blog is forgotten! In case you are wondering where I am these days, its over on Instagram! Personally its easier to post a quick little photo and blurb than it is to sit and blog.

But there is so much I can't do there that I can do here! Many time I have so much more I want to tell or show you and I can't do it all in that tiny little photo!


So, no promises here but I really want to be here much more often with fun and helpful posts! I really appreciate that so many of you have stayed with me!

If you are not on instagram, you should check it out! There are so many wonderful makers there and I have had so many wonderful customers come from IG!

If you do have a business on IG, let me tell you this course I took this summer from Melissa @compliment was amazing! She is offering it again on Monday Jan 11. I not only more than doubled my following with quality followers, I also grew my business! Its was my best year yet and this year so far is proving to be even better! There is still time to sign up too! Click here  for more info. But it was hands down the best investment I have made for my business!
 Sign up Here

For now I am going to keep filling orders and get more of these guys ready for my next Gnome sale on Sunday! They go on sale at 3:00, all one of a kind adorable gnomes! Watch me on IG and ETSY for more information!


Thanks for sticking with me!
Missy


Wednesday, May 6, 2015

Dye job

So I can't wait to show off my latest dye job! 😂 No, not my hair, although the shiny ones are popping through again!
I was asked to create a sign that matched a wedding invitation! 
This is the very bottom of the invitation. 
So first I got to work on making the sign. 
Stained the wood and then painted antlers in place. 
Once everything was dry I distressed and sealed it. 
Now it's time for the fun stuff! 
Dye the burlap! Today I used Rit dye in petal pink and tangerine. 
I mixed in a small sink wash tub, but a sink or bucket would do the trick! 
I added 3 cap - fulls of the pink and 1 tangerine. I know, very technical. I cook this way too, sometimes it works, other times we have cereal. 
Next, add the white burlap to the dye bath and check every minute or so until it's your desired color. Once you have the color you want, ring it out  and hang to 
dry. I lucked out and had a nice sunny day so my burlap dried very fast! 
Once dry it was ready to make flowers! 
I cut 1" strips and twisted and glued until I had all the flowers I needed.
I used apple green for the leaves. Such a pretty color! 
Then simply glued them into place! 
Here is the finished sign! What a fun gift! I hope the love it as much as I loved making it! 
Now go buy some Rit dye! It's awesome! 

Wednesday, January 7, 2015

How to accomplish your goals

I know I always think I have plenty of time to get the things done that I really want to. I will craft more, I will send more time with my family, I will plan and cook healthier meals. Well the reality is life is busy, crazy some days and most of the time, weeks, months fly by and before we know it its another new year and we are making resolutions we won't keep. Why don't we keep them? Because we don't make a plan.

I always have great plans & ideas in my head & all those things I want to make that I saw on pinterest! But then & all too often, after some time goes by and life gets busy, I forget all the things I wanted to do. I realized I never really made a plan to do the things I wanted to do, needed to do in order to grow!
So this year I was serious about making a plan. I was not just going to think about what I wanted to do with my business and hope it would happen. I had to make a plan!
The first thing I did, I bought a planner and a notebook. I use this strictly for my business goals. 
The second thing I did, I opened them up and I wrote in them! 
I know how easy it is to have great intentions, you are motivated & full of ideas so you run out to the store and buy the cutest darn planner ever bring it home and watch it collect dust. 
I have done that more than once. Not this year. I am making some changes! 
So I decided that on my lunch hour at work I would work on me, and my business. 
I leave the office and site at a little shake shop, drink my healthy lunch and work on my plan! 

Step 1-Identify your goals
Create a realistic list of what you really want to accomplish. 
Keep it to 4-6 things
Step 2. Make a plan
How are you going to accomplish those goals? 
Break it down and really think about what it will take to get you where you want to be!
Goals that are too big become overwhelming, start small and get bigger.
Step 3. Write it on the calendar, schedule it!
Make sure you schedule things for when you can realistically work on them.
I know my lunch hour is a great time to GSD (get shit done)
But before I get to the lunch hour, I already know what I will work on, because I created a plan! 
I write down exactly what I am going to do and how much time I am allowing myself. If you give yourself 20 minutes, stick to it. If you find that it was not enough, simply adjust for the next time. 
You are much more likely to accomplish your goals if you write them down! 
I can't tell you enough how good it feels to look at the list all crossed off once its complete! 
This is so true! There is something to this that makes your goals feel more like a commitment! 
Step 4. Use the planner every day!
It takes 28 days to create a habit, I find that even after a week it is easier. Change takes time and success doesn't happen overnight. Don't be too tough on yourself. You will slip up, you will forget and something will always get in the way. But just get back to it the next day and before you know you won't know what you did before! I never used to keep a planner and now I am lost without it.
If ever I find myself feeling so overwhelmed I can't get a thing done (which can be often) I stop and make a list. It makes me feel better almost immediately! 


I am so excited about 2015 and what is to come but  know that I will never be where I hope to be without a plan. The first week is the toughest. Be true to who you are and where you want to go! 
I would LOVE to hear your goals, planning ideas and success stories! Please share! 


Saturday, November 15, 2014

Time for a flash sale!

Well I was finally able to buy my own domain name and yesterday I finally became a .com! Yay! To celebrate I am having a sale this weekend only!! 
Stop by my etsy shop and use the coupn code to enjoy 10% off your entire purchase!! Nov. 15-16 only!! 

Thanks for stopping by!! 

Missy 

Tuesday, November 11, 2014

DIY Christmas Décor- a tutorial


I love to make my own Christmas decor when I can. This past weekend I spent some time out doors cutting fresh pine to create some wonderful outdoor arrangements to decorate my porch! Then it was time to work on the inside of the house! I am in love with anything burlap and love how burlap ribbon looks on a Christmas tree. It is super easy to make, so let me show you how!
 
To start, get yourself some burlap. It can be bought at any fabric store, or go to your local coffee bean roaster, they often give them away. 
Cut the burlap into long strips, mine are about 2.5 inches wide. I always cut with a rotary cutter (they are made specifically to cut things like fabric) but scissors work well too.
 Before we go onto the next step, we need to finish the edges of the burlap. Now if you have a serger (specific sewing machine), just run it through to finish the edges. If not, a simple stitch along the edge with a regular sewing machine will work well too.


I like this look too because it allows you to fray the edge slightly without everything unraveling.
 
Now before we add this to the tree, I want to show you how to make one more of my favorite items. Rag ball Ornaments! 
You will need some type of Styrofoam or paper mache balls. The ones I use are 3” in diameter. For the fabric, you don’t need much. 1/4 yard would be plenty. I cut 6 strips that were 1 1/4” wide by 10.5” long. 


Begin by taking 1 strip and use hot glue to glue the 1st strip to the top of the ball. Wrap around and glue the bottom over the top. Continue this process until you have covered the entire ball. I will alternate where I glue so all of the glue isn’t at the top.


Once you have covered the entire ball. Add a hanger. I used twine to keep it rustic looking. Tie a knot at the bottom, dab in hot glue and attach to the top of the ball. I also used a long quilting pin to secure it in place.

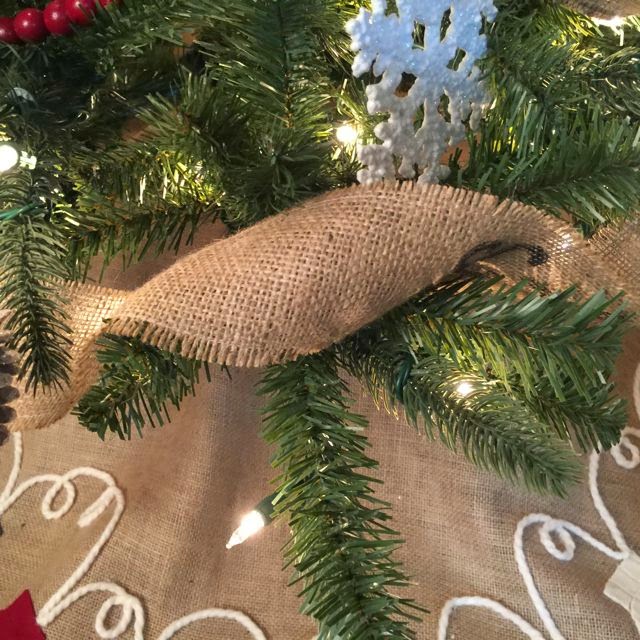
 Time to add them to your tree! I twist the garland as I wrap it around the tree.
This one shown is what the serged edge looks like. I used a contrasting thread here.


And there you have it. Wonderful handmade decor that is very affordable. These would make such great gifts! You can customize them to match any decor, experiment with other fabrics such as cotton, muslin and lace! 

If you are uncomfortable attempting DIY tree décor for the holidays, I know that Shutterfly has customizable Christmas ornaments you can create pretty easily. Have fun! 


I would love to see what you create! If you instagram, please use #thelittlegreenbean on your DIY Christmas projects for a chance to be featured!

Enjoy your projects!


~Missy

The little green bean