Showing posts with label tutorial. Show all posts

Monday, January 25, 2016

Easter is coming!

I imagine if I had an actual store with walls and windows this is what you would see in the next couple of weeks! 
These are all of my newest items that will be available in my shop this Friday! I worked all weekend on new pieces and creating a fun new twist in some things I have created in the past! It was fun to be re inspired and make them just different enough! 
You may remember these guys from a few years back, I designed them about 5 years ago and have sold them in a variety of ways, but I have to admit this is one of my favorites! 
This is a new wreath I'm working on. The carrots were so fun to make with twine and rit dye. Watch for a tutorial this week!!

That's its for now. Keep an eye on my IG account all week for more sneak peaks and a wonderful Valentine giveaway that's happening now!

Friday, April 10, 2015

How to dye burlap-a tutorial

Happy Friday!! The sun is shining and I hear robins singing!
So it's really no secret that I love to dye burlap! I use the liquid rit dye and it's so easy!
You can make any color you want! 
Today I'm going to make coral. I simply did this in a washtub in my craft room. 
I used Ivory burlap to start. 
Mix 1 tablespoon of tangerine and 1/2 tablespoon of scarlet into hot water. Remember, the more water you add the lighter the the color will be. 
Add your burlap, and let soak. Stir it around a bit and continue to check the color often. The longer it soaks the darker it will get! 
Once you have your desired color remove from the water and wring it out well. Depending on how much color you have added you may want to wear gloves so you don't stain your hands! 
The color will get lighter as it dries. I did 3 different shades. I used the same batch of dye, I just added a little more color to deepen the shade. 
Now is the toughest part, waiting for it to dry!!
 I have this awesome metal shoe rack from Amazon that works great to dry fabric in front of my fireplace! 
Here are the 3 colors all dry. So yummy! 
Now you're set to create your fun project! 
I made flowers for a pillow!
Now you have the entire weekend to go & play with some Rit dye and burlap!!
Have fun! 

Saturday, January 17, 2015

DIY oversized ironing board

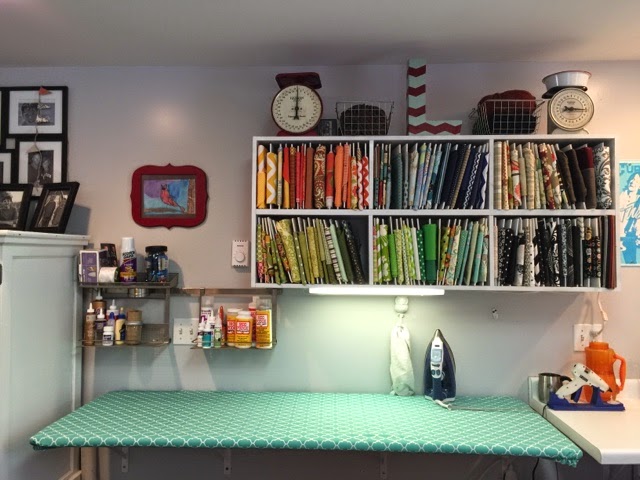
I don't know about you but craft projects and a standard size ironing board don't work too well! There is never enough room! So I made one and I'm going to show you how! It's very easy! 
Here is the shopping list: 
3/4" plywood cut to size
Metal wall anchors 
Heavy duty shelf brackets 
Batting 
Old sheet or plain fabric 
Fabric for cover
Elastic

The great news is you really only need a stapler and screw gun to do this! 
Home Depot sells many sizes of plywood pre cut and if they don't have what you need they will cut it for you! I would use at least 3/4" thick wood. 
You will also need heavy duty shelf brackets and metal screw anchors if you're not going into wall studs. Don't bother with the plastic ones! 
Measure and attach your brackets to the wall. We made sure to go right into studs! 
My board is 6 ft long so we used 4 shelf brackets. 
Next add the batting ( I used 2 layers) to the top & sides of the board. Simply lay it on top and fold over the sides. Secure it to the under side using a stapler. 
Next I add a fabric layer. I used an old sheet. I also cut so it will cover the top and wrap around the edges. 
Pull this layer nice and tight as you staple. Place the board on the brackets and screw in place from the underside. Now it's time to make the cover!
 
Pick a fabric that you love but know, it will get dirty and eventually if it's like mine, ruined from glues and adhesives! 
I cut mine approx 4" long and wider than the board. 
I marked the corned with a fabric pen to use as a guide to see the elastic in place. 
Use scissors to round the corner before you see the elastic in place. 
See elastic into all 4 corners and it's done!! 

Now it's time to go to Amazon and get a Teflon ironing May to use when I'm working with heat n bond! 😉
Iblove having this Ironing board it's crazy for all my projects and even better for long items like table cloths and curtains! 
Happy sewing! 

Thursday, December 4, 2014

DIY Christmas Pennant Banner

Now that its December, Christmas decorating is in full swing!!
Today I'm going to show you how to make a super easy Christmas banner! 
You will need: 
Burlap triangles (hand cut or store bought)
Paint
Stencil brushes
Round stencil sponges 
Twine
Frog tape- straight and chevron shape tape

Let's get started! 
First if you made your own burlap triangles you'll want to sew along the edge to keep them from unraveling!! You can buy these ready to decorate at almost any craft supply store. I have seen them at Hobby Lobby!

Next, lay the triangles in a protected work surface. For the stripe and the chevron you'll want I add tape where you don't want the paint. 
Next, use your pushes to carefully apply paint. Let dry, this usually only takes about 30-40 min. 
Let's the chevron and stripes begin to dry. For the polka dots I free hand them using a round sponge stencil tool. 
I believe these are from Michaels. Add as many polka dots as you like! I wanted 2 different sizes so I used a small and large sponge!

Once dry and you have removed the tape you are ready to add them to the twine. I like to leave about 3' on each end for hanging. 
I attach mine using a zig zag stitch to ensure they stay in place! Also a piping foot is great to help keep the twine in pace while sewing! Simply sew along the top edge until all the pennants are in place! 
That's it! Your done! 


Super easy and fun to make! It's a great project for the kids to help out with! 
Have fun! I would love to see your creations! Find me in Instagram and tag the little green bean to show me your work! 

Missy

Saturday, November 15, 2014

Pinterest craft night- make your own snow globes.


Tonight the boys and I made some snow globes. They are all over Pinterest right now. I read a couple different tutorials and I'm here to tell you what works and what doesn't! I was having a panic attack when I thought I was having my first Pinterest fail moment! Then I realized the cause. So I'm here tonight to prevent you from having my same fear. 
1. No need for styrofoam. It's messy, glue melts it and it makes the water cloudy. 
2. Canning jars or old sauce jars are the way to go, jars without seals leak. Trust me. 
3. You need lots, I mean lots of glitter. 
4. Don't go crazy buying a ton of stuff to put in them. Unless you are using really large jars, not much fits on that lid. 

Now that you know what not to do, I'm going to show you step by step what to do! 
Here's what we are going for! A cute snow globe, it's inexpensive and the kids can help make it!
Supply's: 
Jars- canning or some type of jar with a seal. 
Ornaments or figurines. Make sure they fit in the mouth of the jar and they are tall enough to see. 
Glycerin- cake supply aisle at Michaels
Distiller water 
Diamond dust and a chunky white glitter
Small pliers (if you bought ornaments you'll want to take out the eye screw.)
And a hot glue gun. You don't need any fancy epoxy or other glue hot glue works great! 
Step 1. Remove eye screw or hooks from ornament with pliers. 
Next use hot glue and apply to the base of the ornament. Press into the inside of the lid. Hold until the glue dries and its secure. 
Now let that sit a moment , fill your jar almost to the top with water. Add some glycerin. I didn't measure. I just dumped it in! Add lots of glitter! 
Now you are ready to add the lid with your ornament. Carefully add to the jar, it may spill if you have too much water. Screw lid on tight. Turn it over! Now if you need you can add more glitter and glycerin. If the glitter falls too fast you need more glycerin. Be sure to shake well! 
Now you can leave the bottom as is it add a ribbon or lace. I like how the lace made it look more like a real snow globe with a base! 
Simply add hot glue around the outside of the lid, and then apply your trim.
So there you have it! Very easy to do, and hopefull you can avoid the mistakes I made! 
They were fun and now the kids each have their own snow globe! They would make great gifts for the grand parents or teachers! 

Happy crafting!

Missy

Tuesday, November 11, 2014

DIY Christmas Décor- a tutorial


I love to make my own Christmas decor when I can. This past weekend I spent some time out doors cutting fresh pine to create some wonderful outdoor arrangements to decorate my porch! Then it was time to work on the inside of the house! I am in love with anything burlap and love how burlap ribbon looks on a Christmas tree. It is super easy to make, so let me show you how!
 
To start, get yourself some burlap. It can be bought at any fabric store, or go to your local coffee bean roaster, they often give them away. 
Cut the burlap into long strips, mine are about 2.5 inches wide. I always cut with a rotary cutter (they are made specifically to cut things like fabric) but scissors work well too.
 Before we go onto the next step, we need to finish the edges of the burlap. Now if you have a serger (specific sewing machine), just run it through to finish the edges. If not, a simple stitch along the edge with a regular sewing machine will work well too.


I like this look too because it allows you to fray the edge slightly without everything unraveling.
 
Now before we add this to the tree, I want to show you how to make one more of my favorite items. Rag ball Ornaments! 
You will need some type of Styrofoam or paper mache balls. The ones I use are 3” in diameter. For the fabric, you don’t need much. 1/4 yard would be plenty. I cut 6 strips that were 1 1/4” wide by 10.5” long. 


Begin by taking 1 strip and use hot glue to glue the 1st strip to the top of the ball. Wrap around and glue the bottom over the top. Continue this process until you have covered the entire ball. I will alternate where I glue so all of the glue isn’t at the top.


Once you have covered the entire ball. Add a hanger. I used twine to keep it rustic looking. Tie a knot at the bottom, dab in hot glue and attach to the top of the ball. I also used a long quilting pin to secure it in place.

 Time to add them to your tree! I twist the garland as I wrap it around the tree.
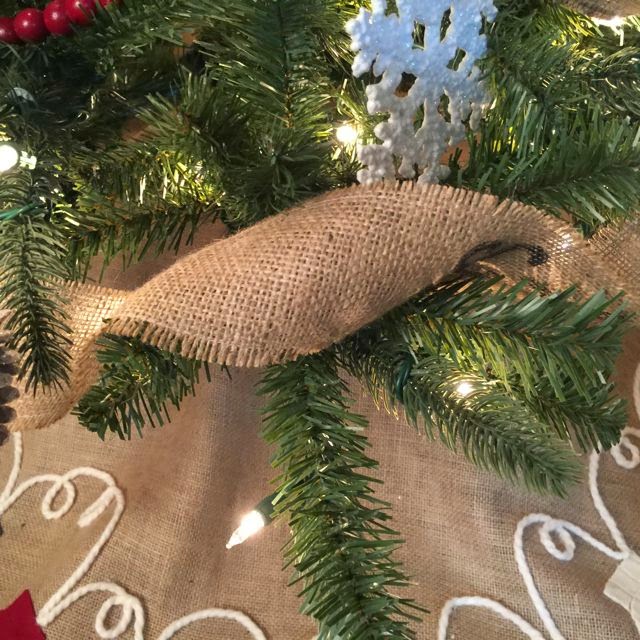
This one shown is what the serged edge looks like. I used a contrasting thread here.


And there you have it. Wonderful handmade decor that is very affordable. These would make such great gifts! You can customize them to match any decor, experiment with other fabrics such as cotton, muslin and lace! 

If you are uncomfortable attempting DIY tree décor for the holidays, I know that Shutterfly has customizable Christmas ornaments you can create pretty easily. Have fun! 


I would love to see what you create! If you instagram, please use #thelittlegreenbean on your DIY Christmas projects for a chance to be featured!

Enjoy your projects!


~Missy

The little green bean