Monday, November 28, 2011

Mitten Applique Tree Skirt & A Pillow!

Still sewing away!! Yesterday I decided to make some applique tree skirts! This was my first one.
I found the mitten pattern for free on a website that had it in SVG format so I could use it with my sure cuts a lot and my cricut. I cut out 6 pair of mittens with heat n bond and then applied it to different pieces of recycled wool sweaters. 

I ironed each pair in place and then glued on the yarn that connects each pair. It was really fun to make, but a lot more work than the others I have been working on! 

This one has a double muslin ruffle and is 54" in diameter! 


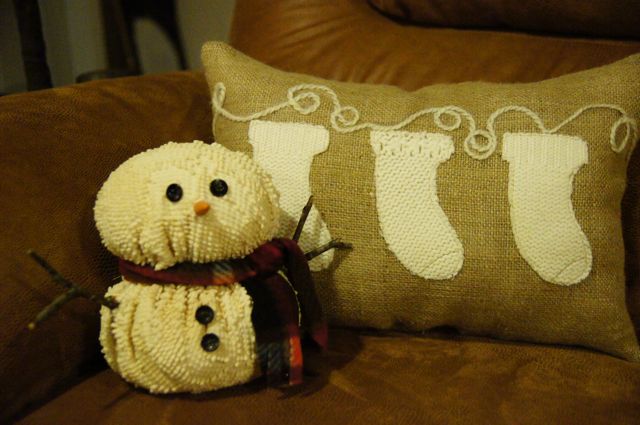
Here is a mitten pillow cover I made the night before! It makes it easier to cut up cute sweaters when this is the outcome!! 


UPDATE May 2013:
If you are interested in this tree skirt it is available in my ETSY shop! I make them to order so the mittens will not be exact. Thanks so much for stopping by!


Saturday, November 26, 2011

More Sewing!

Here is a look at my most recent creations! I have been sewing like crazy lately, but I am having so much fun! 
 Mitten applique pillow...
 Knit Stocking Applique Pillow

Happy Holidays! 

Monday, November 21, 2011

Pottery Barn Pillow Knock off!

A good friend of mine sent me the link to a really cute pillow at pottery barn last week. The only problem, the pillow was $49 and that was just for the cover! You still had to buy the actual pillow! So of course, I knocked it off! 
With some burlap, old wool sweaters and yarn, I was able to create this:

I cut the stocking from an old sweater, used heat n bond to attach and then sewed in place. I attached some yarn to the top with permanent fabric glue and sewed the pillow together!


 I like it so much I think I may some more but with different prints and colors!
So what do you think? I do have this one available in my ETSY shop, for much less than pottery Barn, and mine is complete! 
Here are a couple other pillows I made tonight. All 100% recycled products! 

 This was from a sweater that had really cute winter scenes all over it! I have cut them all out to use on various projects!

Sunday, November 13, 2011

Chenille Snowman

I was finally able to make a snowman using an old chenille bedspread that I bought at an estate sale last summer. I didn't have a pattern, so I just cut one large circle and one smaller one. Sewed and stuffed and he was done! 
His nose is leftover from the fireworks on the 4th of July! 

I made a few more owls this year!  You can never have enough owls! 


 I am trying to keep up with my tree skirt sales! I was almost sold out, so I was busy all weekend making some more! Each one is different and all are made from recycled burlap, and different fabrics, many bought from estate sales, so each tree skirt is one of a kind!

Sunday, November 6, 2011

Make your own CD Sleeves

I have been making my own sleeves for my CD's for some time now. I often burn disk's for my photography customers, and I like to make a cute sleeve to protect their photos. Here's how! 
 I take a 12 x 12 piece of scrapbook paper and cut to 6 x 12.
 I then score the paper. I use my fiskars trimmer for this, the scoring blade is great! Do not press to hard, this can still go through the paper. Score on each long side at 1/2 inch.

 Then turn paper and on one end score at 2 1/4 inches from the end, turn paper around and score the other end at 4 7/8. When you fold the paper the top flap should over lap the bottom.
 Fold all the scored edges.
 I then use a round punch and punch a 1/2 circle out of the 4 7/8 side, and then used some type of scalloped edge punch to embellish the small flap.
 Then trim off the 1/2 inch scored edge on each side.
 This is now what your paper should look like.
 I use tacky tape to hold the edges together, cut a 4 1/2 inch for each side and place on the top of the inside edge. make sure that the scored edges are folded in, remove the adhesive back from the tape and fold the sleeve in half.
 Now you have a cute handmade CD sleeve!

 Add your CD, and embellish if you would like.

That's all! It really only takes about 5 min to make one. 
Have fun! 

Tuesday, November 1, 2011

Gettin Ready

Halloween is officially over and it is time to start thinking about the holidays! I have been sewing for a few weeks now, and finally updated my shop tonight. I have changed up my tree skirts from the past years and added some ruffles and flower embellishments. I am still using recycled burlap coffee bean bags from all over the world! That part is so fun!

 This one is my favorite! It will look great under someones tree!

I have also changed up the stockings a bit. This year I went for a more rustic look and used cotton muslin vs sweaters. Much of what I am using here is from recycled curtains. 


What do you think? Should I make some with sweaters too? That could be this weekends project! 
Well once I finish putting away the Halloween decor and getting out the winter! 
I can't wait for it to snow!